Pool Pump and Lighting Control
When my wife's in-ground pool was completed, it quickly became apparent the controls for the pump and lights were designed in a tech vacuum.

The control head (receiver, and manual buttons) was attached to the power panel through a knockout on top. It looked like an afterthought.
The remote control had a monochrome LCD, and refused to stay connected to the control head, erroring out constantly. It was really sad.
What really topped it off was this 'system' was advertized as Z-Wave compatible, but it was anything but. It used Z-Wave internally, but would not work with any other Z-Wave hardware in any useful manner.

PoolPi actually controls three things.
- a relay board that triggers the variable speed pump's four presets
- a pair of relays that kills power to the RGB LED pool lights driver/controller
- a relay that hard boots WeatherPi. This is possible by the happy coincidence of the proximity of PoolPi to the power supply for WeatherPi.
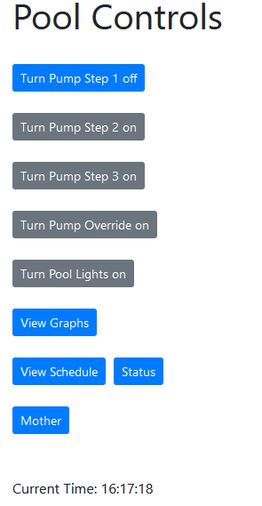
Controlling PoolPi is done by means of a browser interface on my phone. This is not cloud-based. If I need to access these controls, I can do it via a VPN.
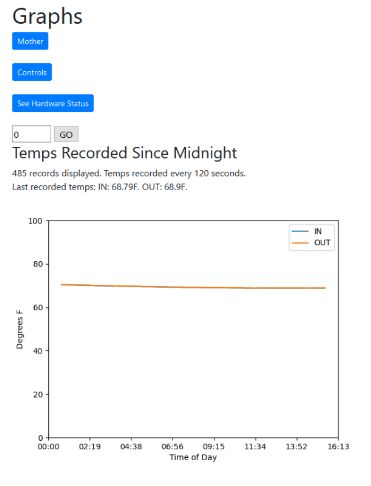
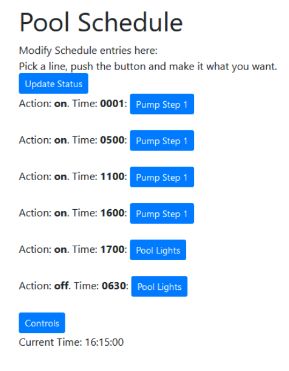
The main screen lets me set the pump speed, view a graph of the water temperature before and after the heater/cooler unit, schedule changes in pump speed and set the On/Off times for the lights.
Water temps are kept in a mySQL database on a small i3 desktop called Brilliant. Brilliant is running Ubuntu, nginx, mySQL, Flask, gunicorn and Python 3. PoolPi is also running nginx, Flask and gunicorn. In the chronology of PiNet's development, PoolPi came first. Moving all of the web interfaces into one machine is under consideration, but there may be value in keeping PoolPi more 'stand-alone'. We'll see.
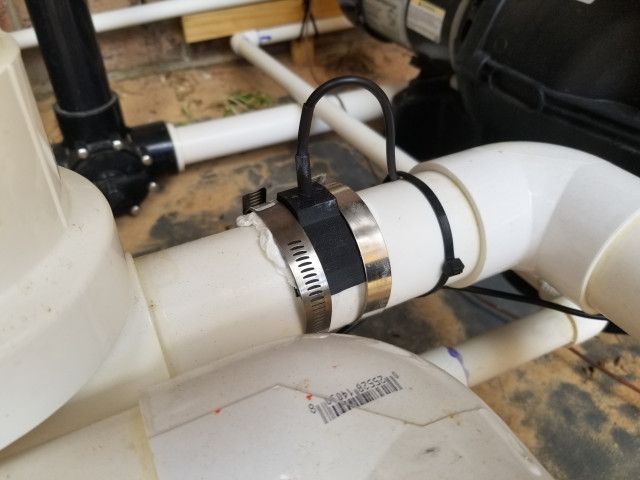
I created these mount glands for the two temperature probes that provide the water temp data.
They are 3D printed, then applied with silicone and pipe clamps. No leaks!
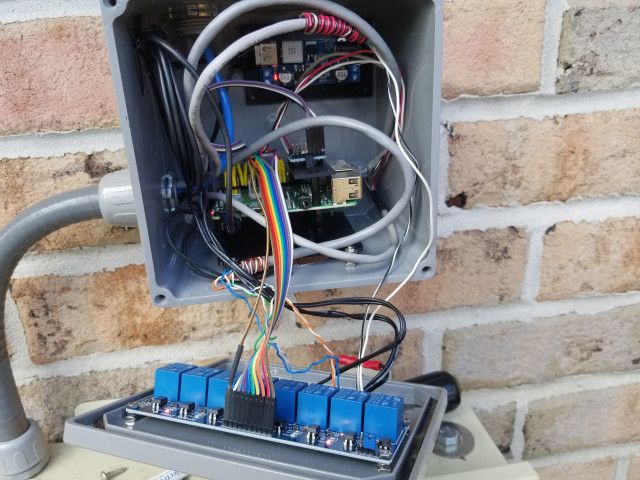
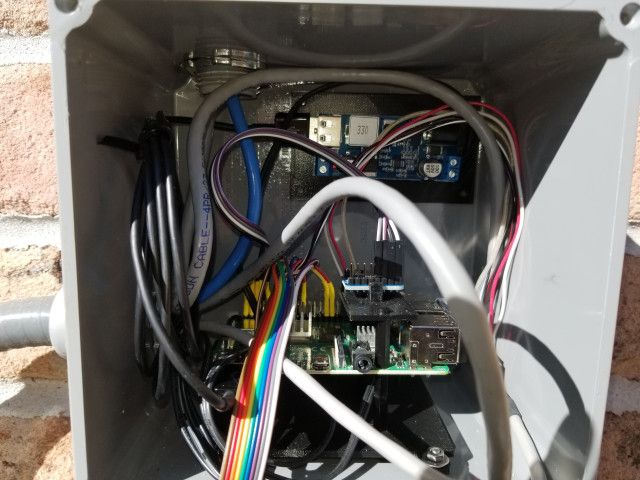
A look inside the box.
There's a BUCK converter up there on the back wall of the box, then the Pi 4 and the RTC module mounted on custom mounts I made. The ribbon cable goes to the relay board, which is mounted to the lid.
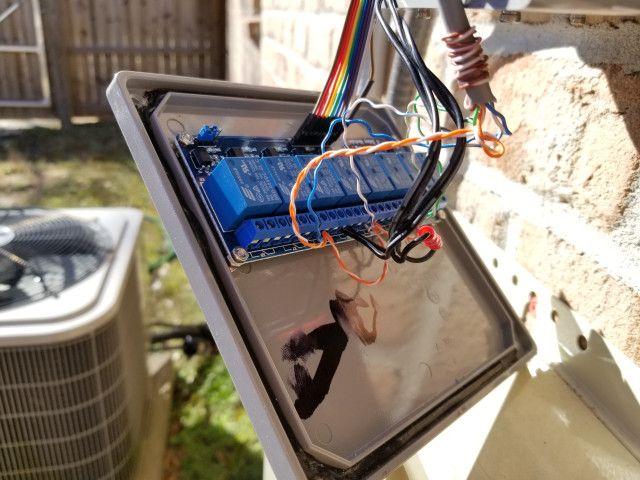
The relay board is held to the watertight box lid with M3 stainless steel socket head screws.
There are a lot of people who take one look at the wire and shudder. It's not dressed in all nice and straight.
The electrons don't care. They get to their destinations just fine, and the job gets done.
Things that Work. That's what that means.