Run Home to Mama: The Bug Pages
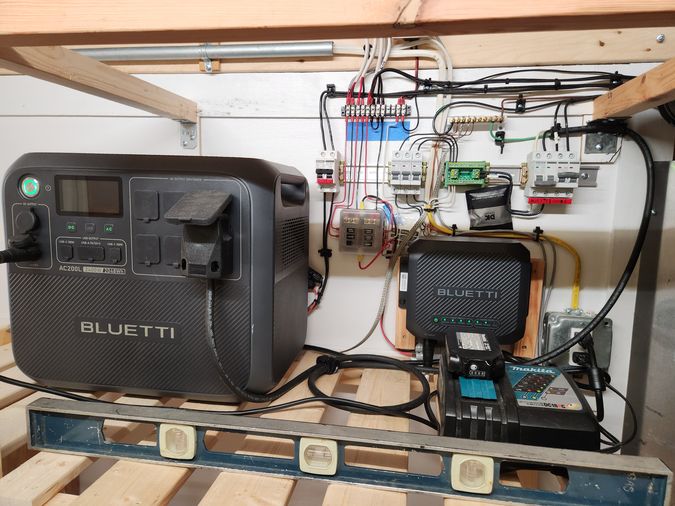 Here is a recent photo of all the pieces and parts.
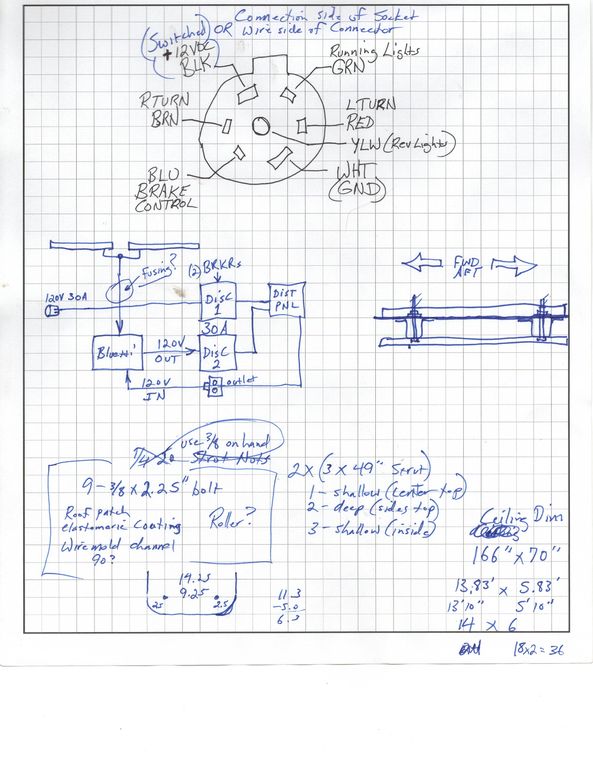
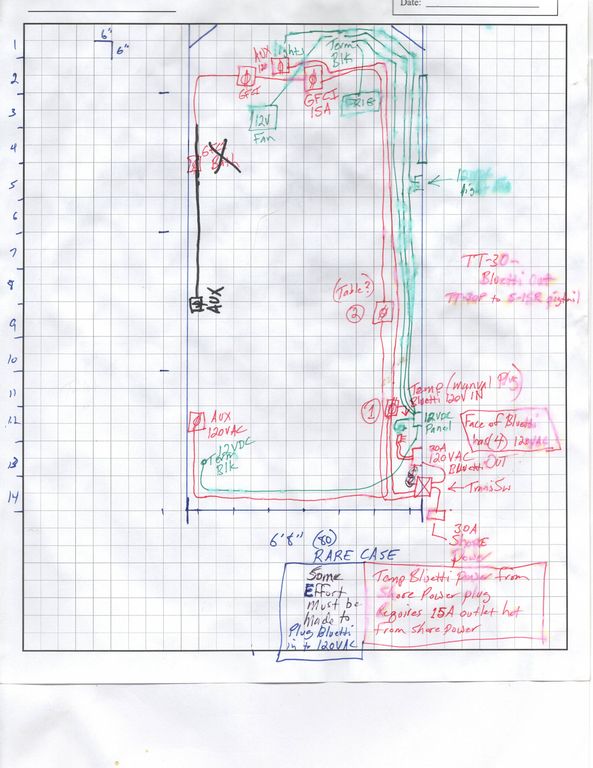 Like everything else, it starts with pen and paper I write it down if I even think it might be important. Ideas are cheap and disposable. On the left are my earliest random notes. On the right is my layout and wiring diagram for both the 12V system and the 120V stuff.
Both of these are more suggestions than actual rules. I found myself modifying the plan as I went. As is always the case with field engineering, you do well to remain flexible as the project unfolds. Too much rigidity causes migraines.
Links Disclaimer
I'm putting Amazon links here for reader convenience. I do not get any form of compensation from Amazon.
Design Intent
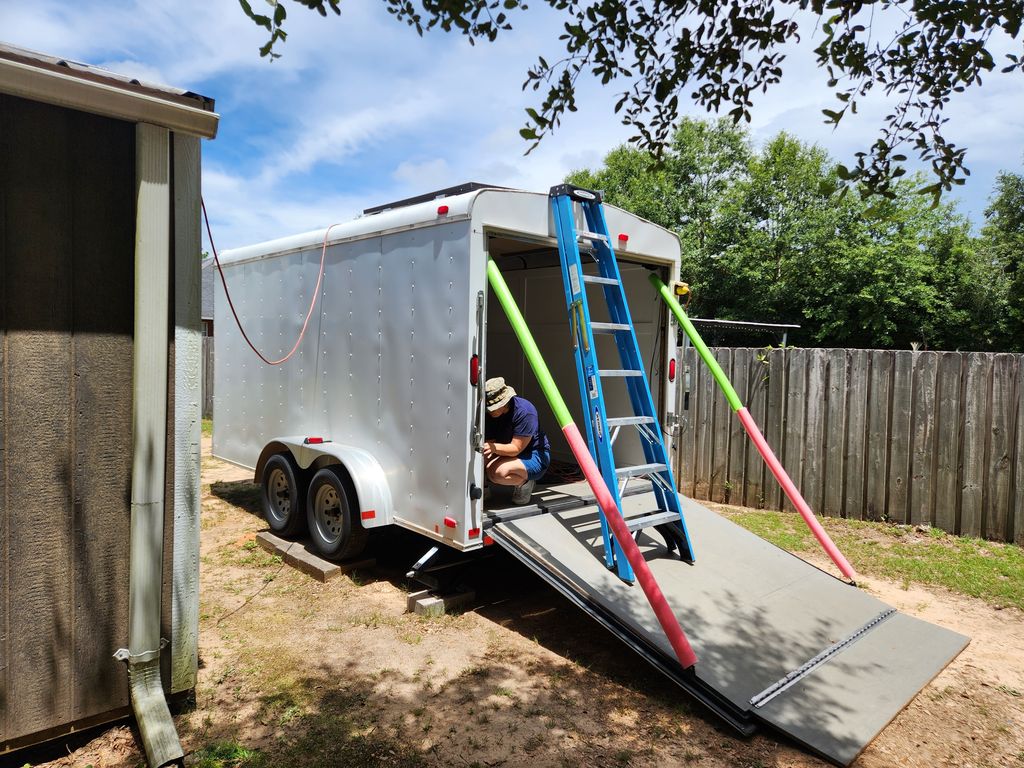
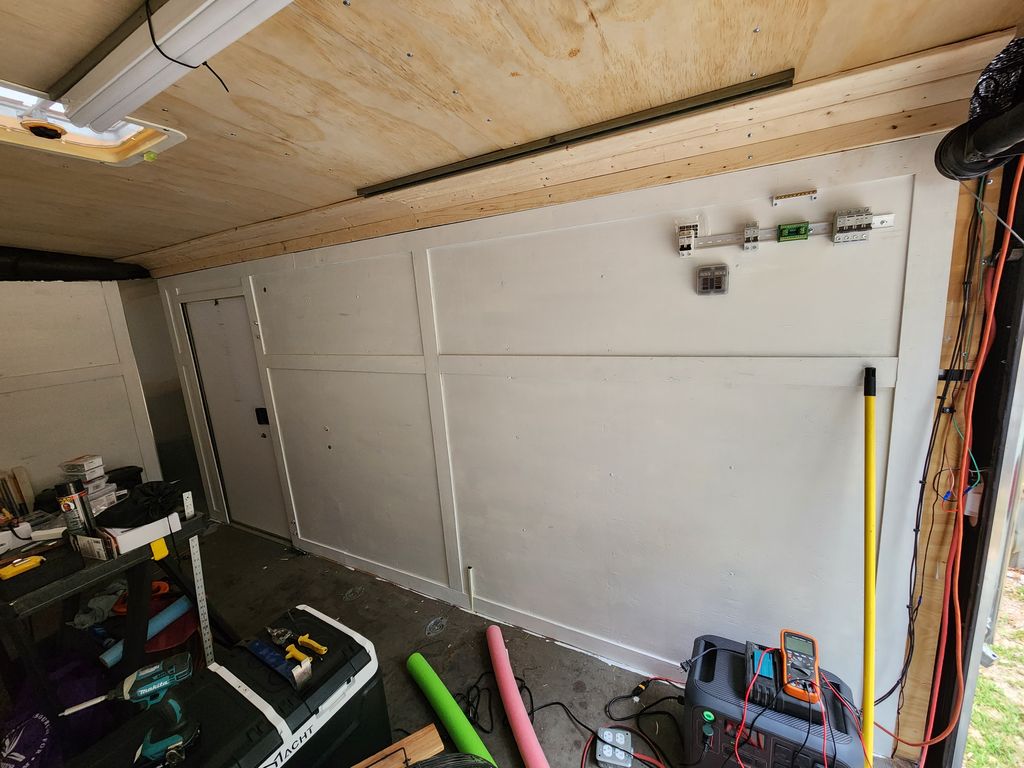
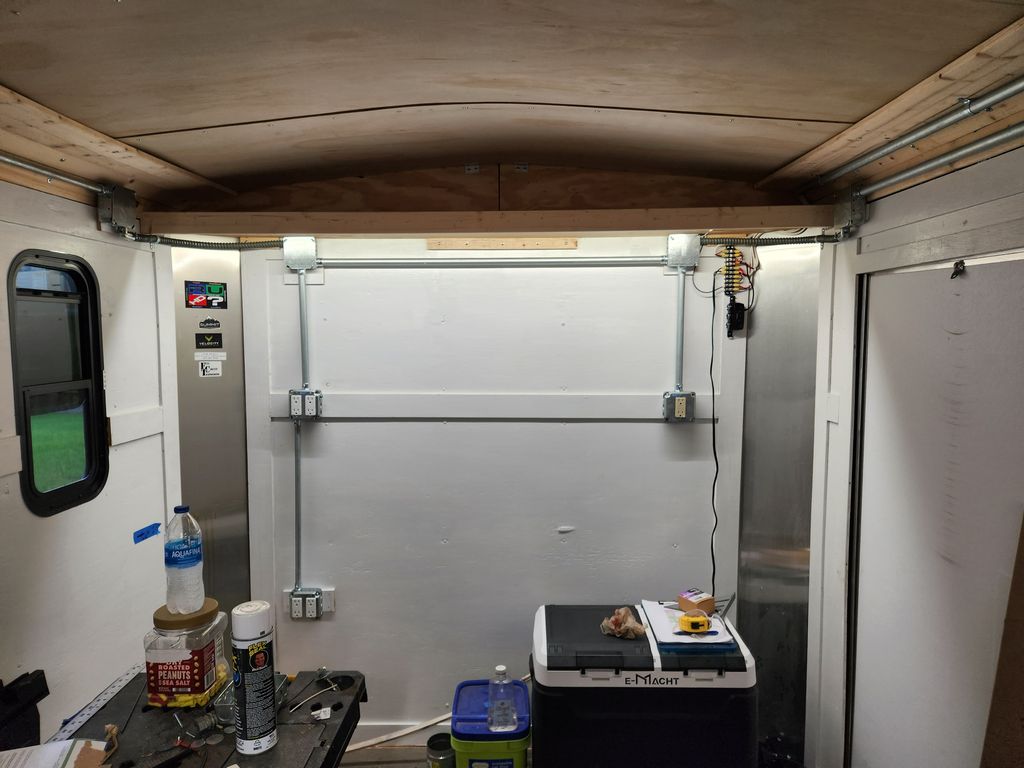
The industrial/steampunk aesthetics of my system appeal to me. I don't care if anyone else likes it. If you don't believe me, just take a look at my work station which my wife named "The Monstrosity". The same sort of motivation applies to The Bug. I want to have everything quickly accessible for repair should the need arise. Safety is a priority, of course, but for the most part, covers and cabinets are just dead weight. I like things where I can see them. Rapid assessment of the status quo.
I used 3/4 inch EMT conduit for everything. The AC circuits are done as you would expect. DC is in conduit primarily to protect wire and for neatness.
System Overview
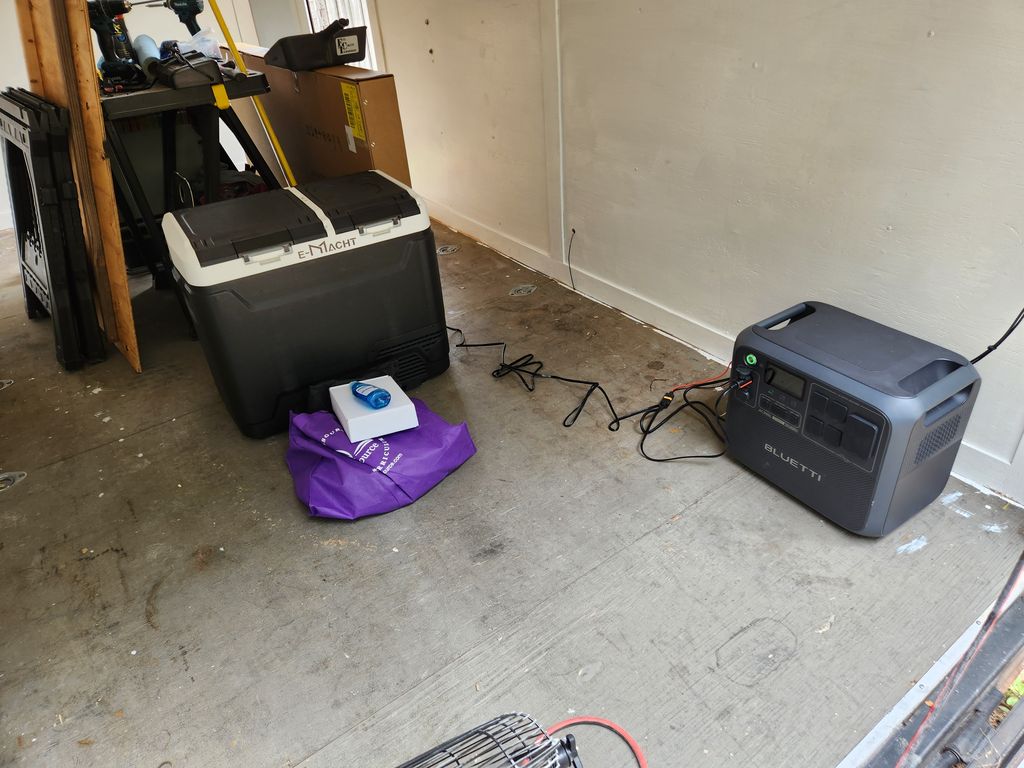
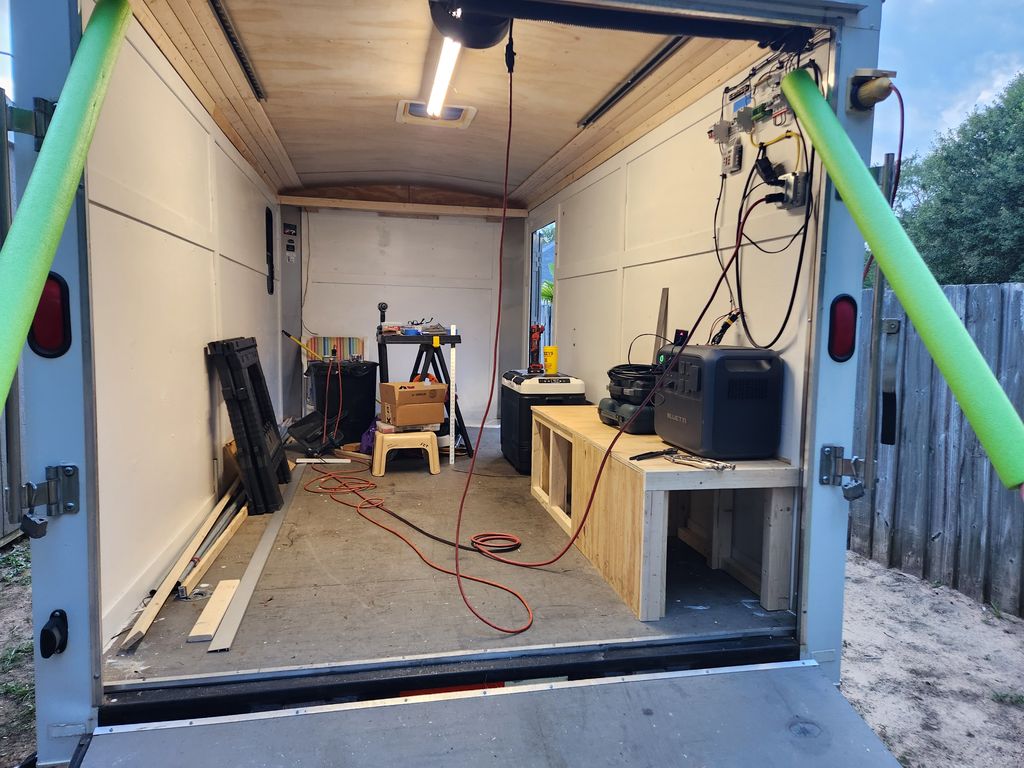
I decided early on to use a Bluetti AC200L power center rather than separate components for my solar-DC-AC system. It is self-contained, portable and adequate for this application. It simplified things, and the cost was comparable.
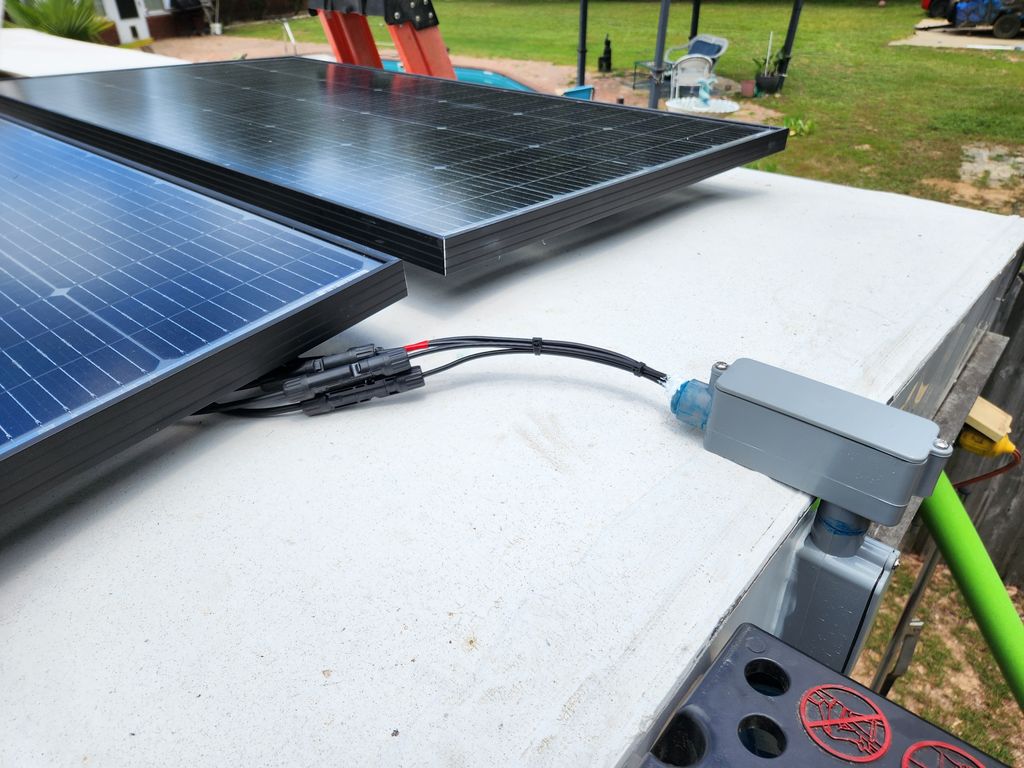
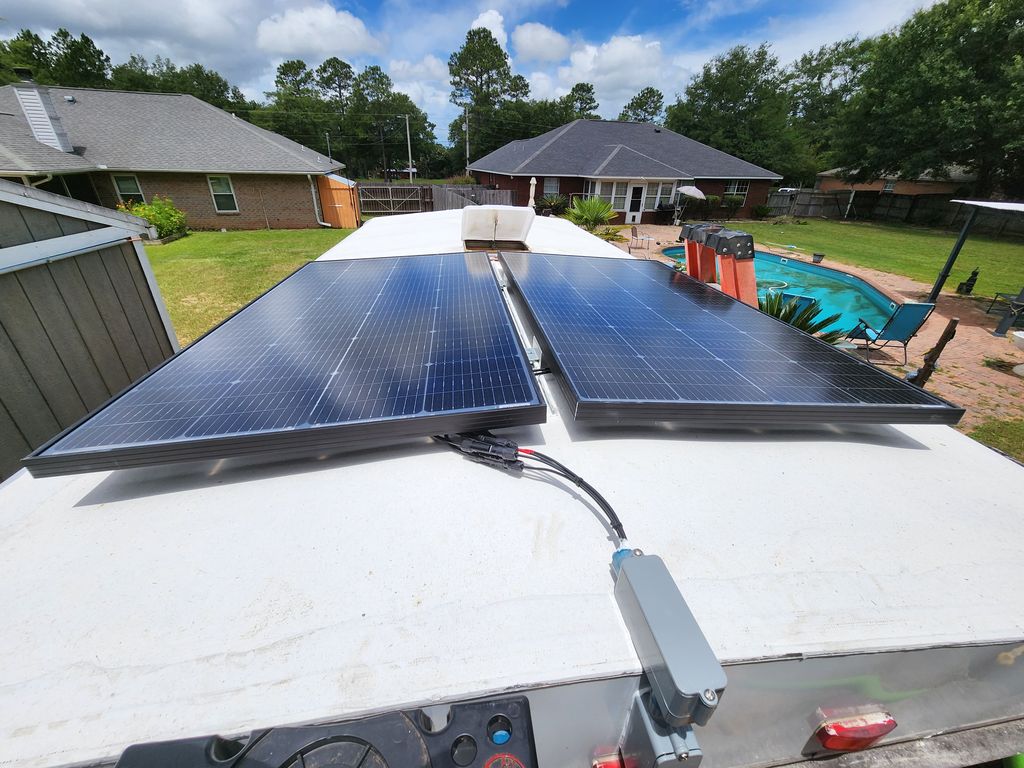
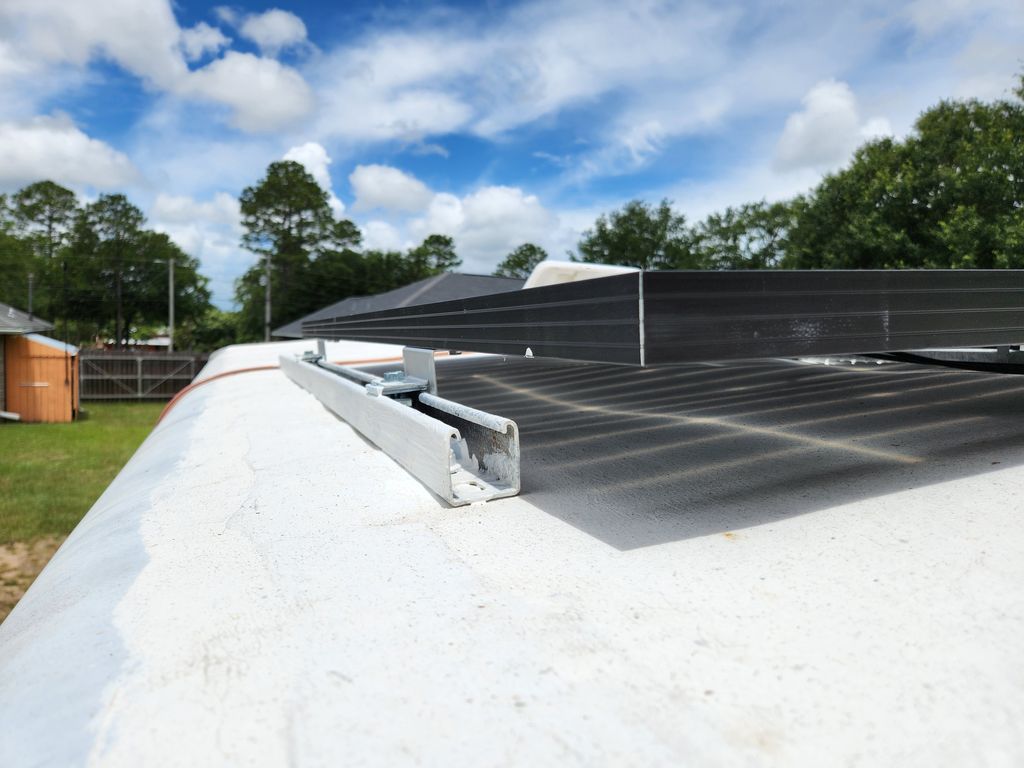
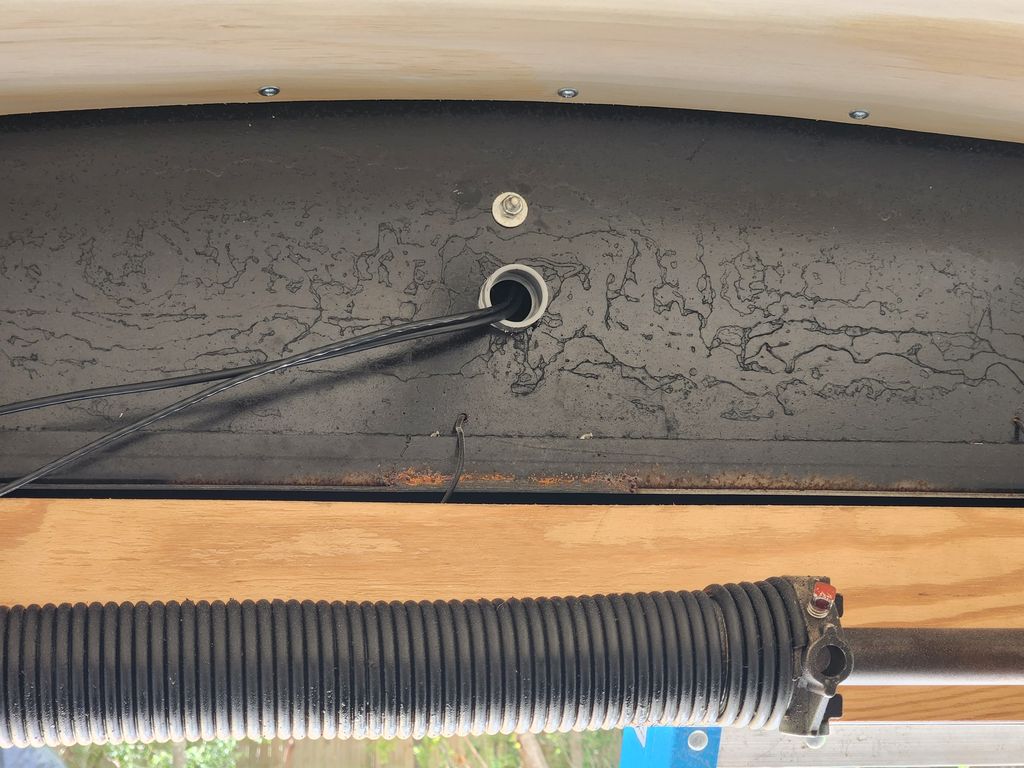
There are a pair of monocrystaline solar panels on the roof. They are rated at 400 watts max output. I bought this kit to build my wiring harness. 10AWG stranded copper wire brings the power down to the cut-off breaker.
I used three lengths of unistrut on top of the roof, with matching pieces beneath to sandwich the ceiling joists. Henry white elastomeric roof coating to seal everything water-tight.
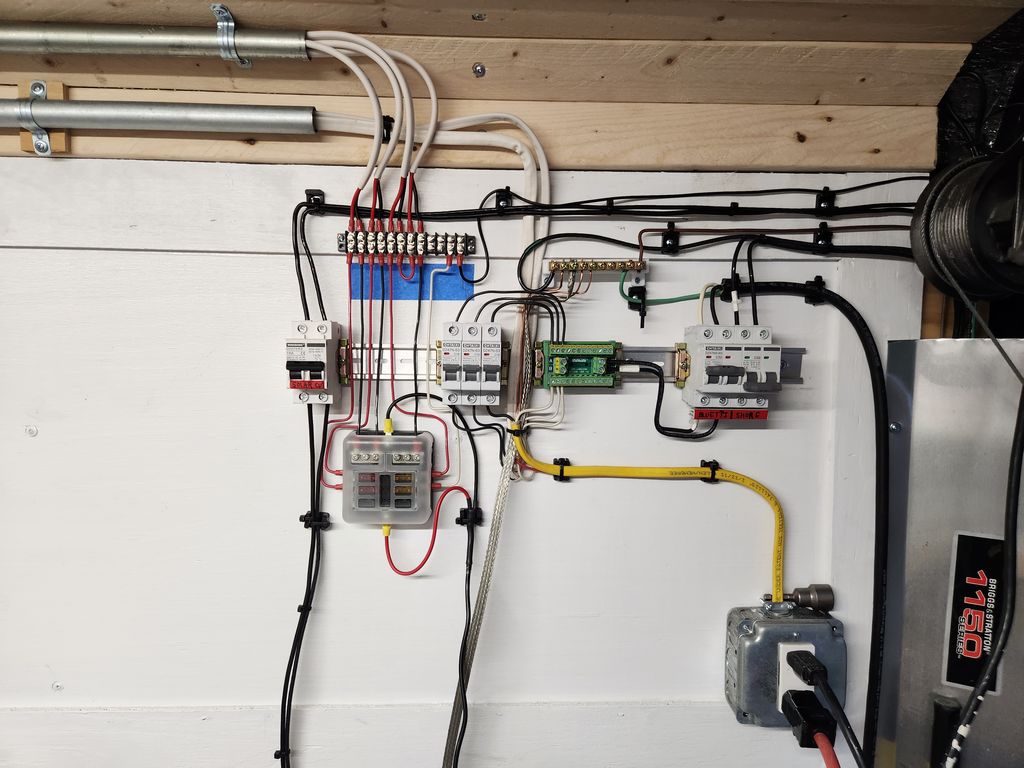
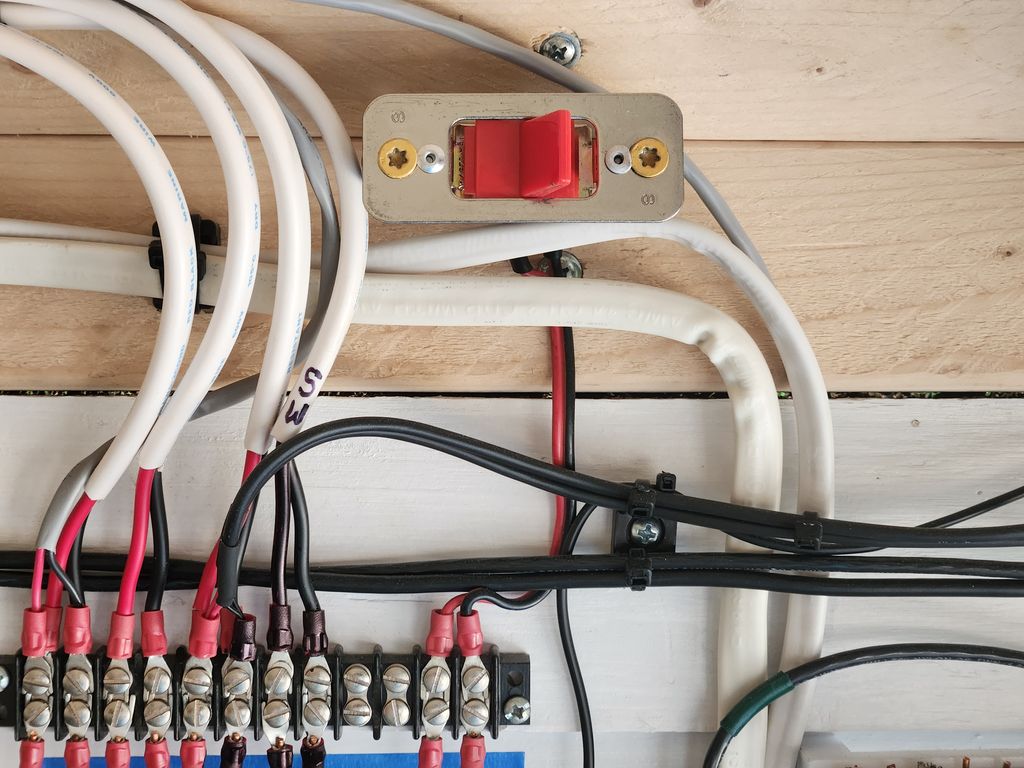
I had an RV TT-30R receptacle already mounted to the trailer that I had used for an external power input. This got new 10AWG wire to a transfer switch to switch between shore power and the Bluetti 120V TT-30 output.
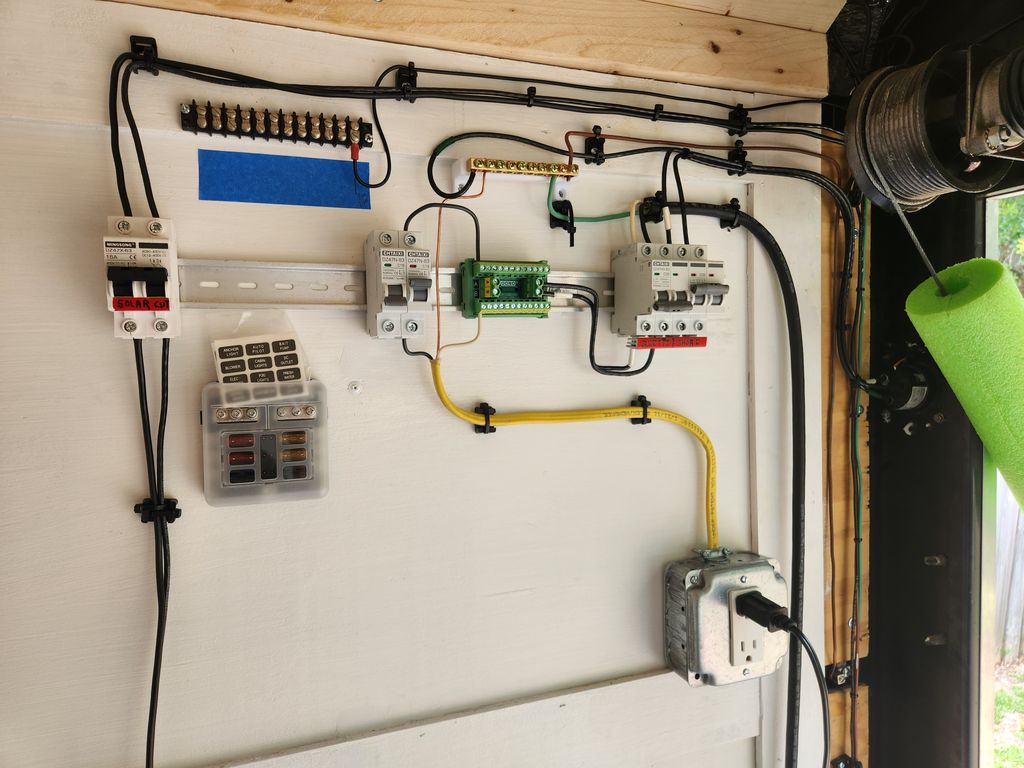
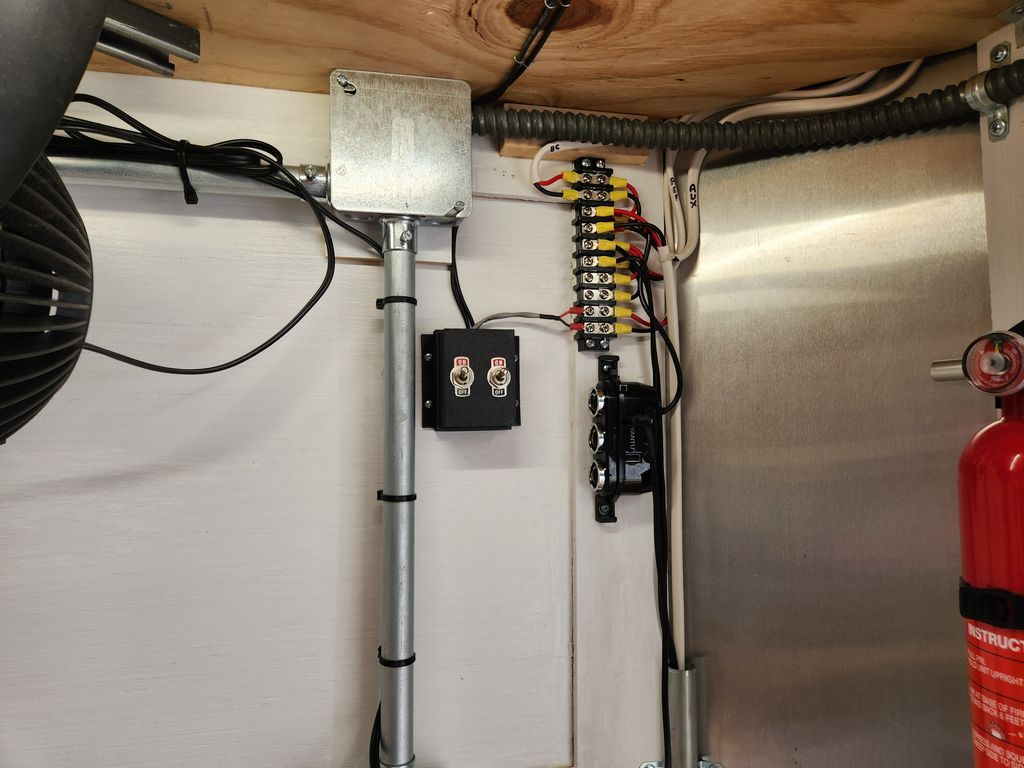
I mounted everything on DIN rail rather than buying a 'in-the-box' solution. We do this on the ships and in our racks all the time, so it made sense to do that here.
With some circuit breakers, a distribution block, ground bus bar and some DIN lock blocks and the AC side was done.
A DC breaker for solar panel disconnect and a DC fuse/distribution block and a couple of terminal blocks round out the 12VDC side. I also bought some marine 14AWG wire for my DC circuits.
I resisted for a while, but finally gave in and bought this $200.00 DC charging module from Bluetti. The reason was it provides me 20 amps of 12VDC from a secure 48V output on the power center. That's double the 10A available otherwise. There are other fringe benefits, but they are secondary.
Lighting
All of the lighting is through use of 12VDC LED tape. I like these little connectors. They work really well. I used a normal light switch housed in a Wiremold shallow box at the side door to turn all lights on and off. Then I added a SPST toggle switch on each of the three light runs for fine control.
I mounted a strip under the lip of the shelf along the forward bulkhead, a second strip is stuck on one of the conduits running along the starboard side, and two strips are stuck on either side of the center-aft unistrut on the ceiling. (and yes, I'm using boat terms, so sue me.)
The entire lighting circuit pulls about 72 watts when it's all on. They also generate some heat, I noticed.
Running Lights
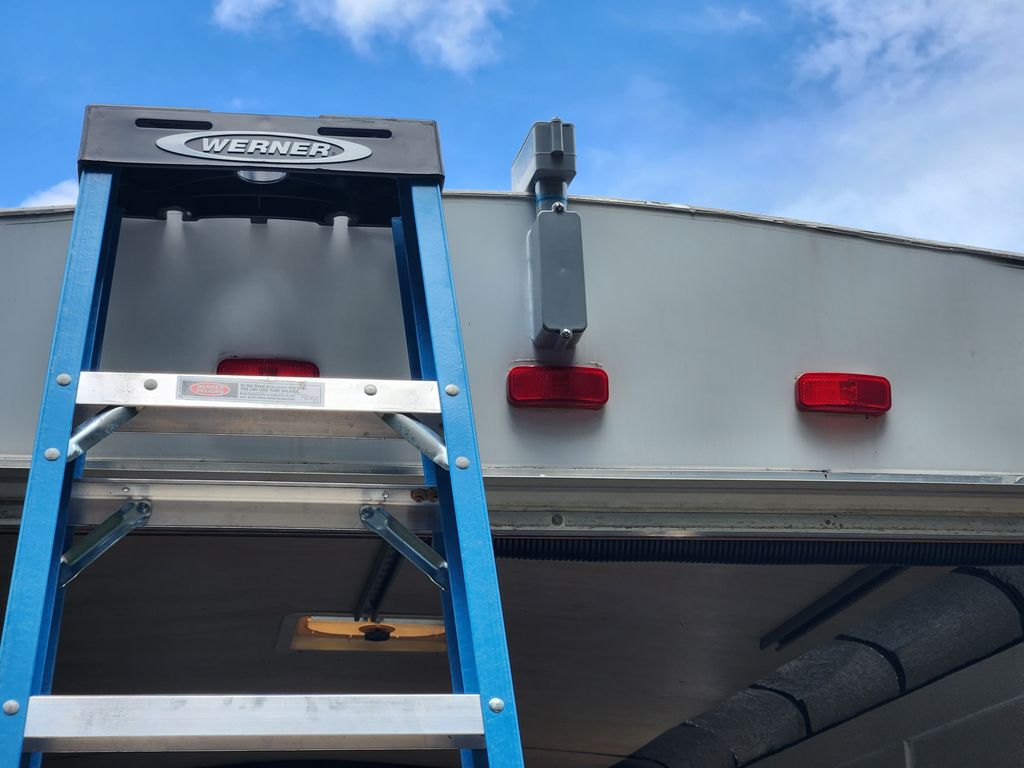
The trailer came with incandescent bulbs in the exterior lights (running lights). They were the standard 194 style. I replaced them all with these LED bulbs. I replaced the tail lights with these exact fit replacements.
The end result is brilliant, and I went from over 100 watts to 13 watts on that lighting circuit.
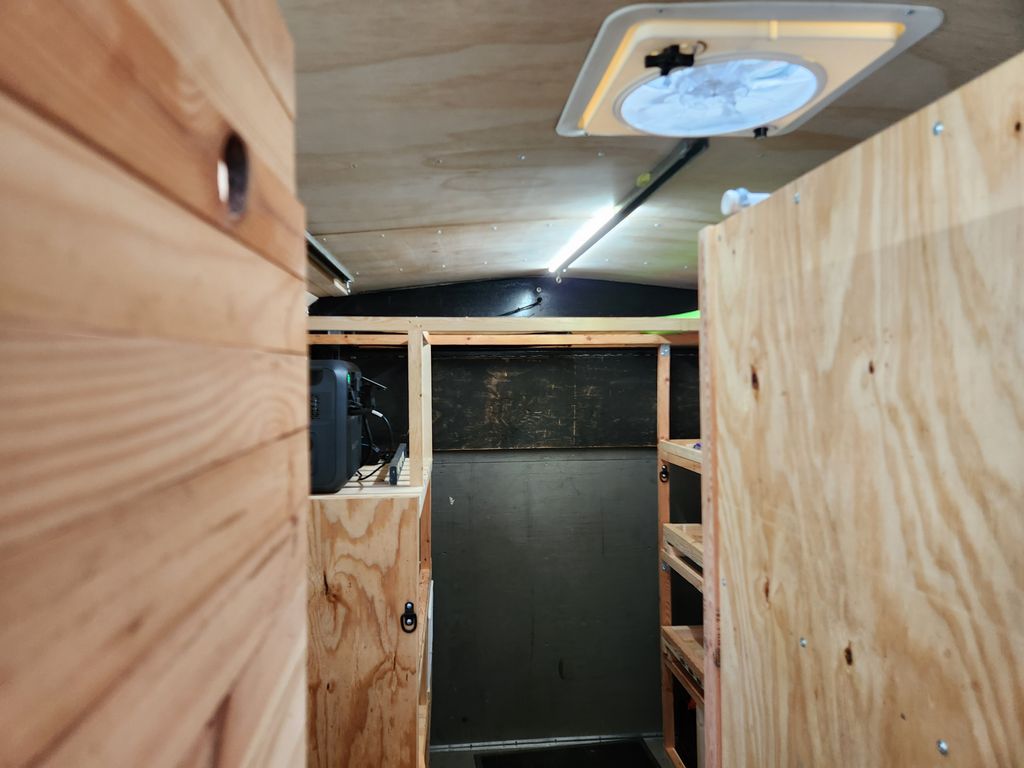
Adding a vent fan to the roof vent
This is a good place to mention this fan kit. I lucked out because the roof vent that came in the trailer was one of two types this fan is intended to fit. It was easy to install, and once I had 12VDC over there it went to work. It moves air really well in either direction, but out is its favorite.
This vent cover allows me to use the fan rain or shine.
Start by figuring out what devices need power.
Just make a list. When you have that 'oh yeah' moment, stop and add it.
When the list is pretty stable, do a quick estimate of how much power it's going to take to run that stuff. Ohms Law is your friend here. Don't be afraid.
If the equipment label gives you volts and amps, multiply them to get watts.
If the label gives you watts and volts, watts divided by volts gives you amps.
That's pretty much all you need to work up how much power you're going to need. Until you start thinking in terms of power over time. Amp hours, milliamp hours, kilo-watt hours . . . it can make your head spin. It's really not that complicated, though.
Watt-Hours Exposed
Decide what measure you're going to use. Watts is pretty standard. Get all your power calcs into Watts and then thumbnail how long you think a piece of equipment will actually run in a day.
If it's 100 watts, and it's going to run continuously for 2 hours a day, then it will consume 200Wh of power. That's 0.2kWh. The same is true if it runs for a total of 2 hours but at different times.
If it runs continuously for 10 hours, then it's 1,000Wh, or 1kWh. The same is true if it cycles on for 30 minutes and then back off for 42 minutes all day.
There are, of course, many fine points that people will tell you need to be considered, and you should spend some time familiarizing yourself with the free advice that's out there.
In the end, always provide more of everything than you think you'll need. If you try to cheap-out on electrical stuff, you will pay for it later. Size things appropriately. In general, in most home situations, 14AWG wire is for 15A (fifteen Amp) circuits (most common). 12AWG is for 20A circuits. 10AWG is for 30A. If the runs are too long, however, those rules no longer apply. But that is not likely to happen in a 7x14 cargo trailer.
Here is the Power Gallery